Archive | Blog

RSS feed for this section

Blog Posts.

Thirty

A glass of milo peng

I’ve done it. After thirty one years on this big blue ball they call Earth, I have finally cracked the secret to making the most delicious drink of all time: Milo peng.

Now at this point, I realise that some of you reading this will have no idea what I’m talking about, so let me explain. Milo peng is a drink. As its name implies, Milo is a key ingredient, sure, but that’s about all that it shares with the Milo made with milk you’d normally have at home, or anything like the warm Milo that your parents might have made for you when you were young. Milo peng has a particular flavour to it that belies a simple combination of Milo and milk, and for the longest time, I wondered what the recipe was to make a staple of Malaysian/Singaporean culture.

If you’re wondering why you’ve never heard of this magical drink before, it’s because you can’t buy it in Australia. No cafe, corner shop, supermarket, or Asian grocery that I’ve been to, anywhere in Australia, has sold it. Trust me, I’ve looked. You might be able to get it at certain Asian restaurants here, but if you want the real deal, you have to go overseas, to Malaysia, Singapore, or perhaps a few other south-east Asian countries. There you’ll find it everywhere, but most likely at hawker stores, food courts, and most Asian restaurants. A good rule of thumb is that if the place has air con, you probably won’t be able to order it. There are, of course, exceptions to this rule, most notable of which is probably Old Town.

Milo peng is such a staple of my Malaysia trips that as far as I’m concerned, it’s become synonymous with the country. Any Malaysia trip isn’t complete without having it at least once, and preferably you have it with every meal that you eat out. It even goes well with every meal!

For as long as I can remember, I’ve asked my parents about how to make it. Sometimes, when we arrived home from a trip to Malaysia, I would ask them, and they would typically be coy about it. Either they didn’t know, or they weren’t 100% sure. My dad seemed to think that the key ingredient was condensed milk, but on the few occasions that we tried making it at home, it didn’t taste anything like the original. After a few years of this, we stopped trying altogether, and eventually, I stopped asking.

When I still lived at home, we’d go to Malaysia every two or three years. It was always nice seeing cousins I hadn’t seen in a while. The last time I went back was 2017, and thanks to this global pandemic we now find ourselves in, I haven’t been back since. With Milo peng cravings reaching stratospheric levels, I finally decided I would take matters into my own hands. If my parents didn’t know how to make it, surely the internet did?

As it turns out, the internet sort of does and doesn’t. I couldn’t find any definitive recipe or guide to making it, as least none that was in English. There were a few blurry-cam YouTube videos, but one was all I needed to know the ingredients; reason being I thought I’d be able to figure out their exact ratios myself.. As it turns out, my dad was right all along. While Milo is a key ingredient, condensed milk is the other one.

Milo peng:
Condensed milk
Milo
Hot water
Ice cubes

Fill your cup with roughly three quarters of ice cubes. In another cup, pour about two tablespoons of condensed milk, along with two to three heaped teaspoons of Milo. Add hot water to the condensed milk and Milo, and stir well. Once it has been mixed down, pour it over the cup with ice and serve.

My only wish is that I wish condensed milk was easier to work with. It’s awful stuff; sticky and non-viscous enough to be annoying. If you’re not careful you’ll easily have a huge mess to clean up, especially if you use the canned stuff. Luckily, the much better (and far less messier) alternative is the version that comes in a handy squeeze bottle. They’re supposed to be used for decorating cakes and whatnot, and you’ll need more squeeze bottles than if you purchased cans, but it’s worth it for not having to clean up afterwards. Squeeze the condensed milk into your second cup, add milo, add hot water, and stir.

I also wish it were easier to prepare and didn’t require the use of two cups. Yes, you could theoretically use one cup to mix the condensed milk and Milo, add the hot water, mix it all down, then add your ice cubes, but doing so requires you to be familiar with the quantities at play so you don’t end up with too much or too little milo peng. Plus, I’m convinced pouring your hot condensed milk and Milo mix over your ice cubes helps even out the temperature of the beverage, when compared to adding on the ice cubes after. The second method means its more likely that the bottom of the Milo peng is warmer than the top. Whether you prefer this kind of temperature differential in your Milo peng is up to you; I am impartial to it and enjoy both variants equally, but for temperature consistency the first pour-over method is best.

Drink and enjoy!

By the time you read this I’ll hopefully had many more real Milo pengs of my own, on account of being in Malaysia. But thanks to the magic of post scheduling, I didn’t add a “stories from the road” prefix to this particular post, in the hopes that there would be other stories I could write and post about. We’ll see.

Yes, I know we’re missing a few years. Time is a fickle thing in a global pandemic, becoming both stretched in some instances, and compressed in others. Before you know it, two years has passed in the blink of an eye, and with it, any chance of posting anything around my usual birthday. We’ll make up the years, I’m sure.
A tale of two ratcheting screwdrivers

Two ratcheting screwdrivers

At its peak, the Australian Apple Premium Reseller known as Next Byte had more than 20 stores around the country, and I spent most of my earliest possible employment years at just one: Next Byte Hobart.

Today, the Apple landscape in Australia is a lot different to what it was over a decade ago. Thanks mostly to the iPhone, Apple is the largest company in the world. Apple owned-and-operated retail locations don’t so much compete with general electronics retailers as much as they offer an experience of their own. But as any reseller will tell you, slim profits on Apple products means it’s extremely difficult, if not outright impossible, to match Apple when it comes to the unparalleled customer experience that Apple Retail can offer. Any third-party Apple presence is either small enough to fly under the radar, or niche enough to carve out a market of their own. For the rest of us, Apple retail stores in every capital city CBD besides Melbourne, Darwin, and Hobart means out in-person sales and service needs are fulfilled, with any gaps covered by Apple’s online store and mail-in repair programs.

I have plenty of stories from my time at Next Byte. Maybe one day I’ll even write about a few of them, once I’m a little more comfortable the statute of limitations has passed. The one I’m telling you about today is about a really nice screwdriver I used to use, but also about some really nice screwdrivers I now own.

When I was doing iPhone repairs at my first place of employment, Apple mandated using a torque-limited, ESD-safe screwdriver on iPhone screws. I think this Wera 1460 ESD Kraftform Micro was the exact one that we used. It was a really nice screwdriver because it made it impossible to over-tighten the screws used on the iPhones, thus preventing any tool-based damage to the devices, but my managers at the time took every opportunity to remind me how expensive it was if, for whatever reason, it needed to be replaced. Which was fair enough, Apple repair margins were slim enough without having to pay three figures for tools, but it meant that while I wanted one, I could never justify owning one for the handful of times I’d need to use it around the house.

Until now.

Just kidding! We’re talking about ratcheting screwdrivers, remember? That particular Wera torque-limited model wasn’t ratcheting, but I feel as though I would only own one (and the specific bit set that it comes with that can’t be used for any other non-Wera screwdriver) if I was getting serious about repairing devices, which I’m not. So the next best thing is a ratcheting screwdriver, which has more general use cases outside of device repair.

Because work has progressively slowed down as we get into the Christmas and New Year period, I’ve been watching a bunch of YouTube videos. And when you watch ANY tech-related YouTube, you inevitably get recommended the Linus Tech Tips channel. You know the one, all praise the algorithm. Which is fine, LTT videos are fine. They can even be great if you’re looking to build a PC, or see lots of sometimes very-interesting PCs get built. One thing I’ve been noticing is that they’ve been pimping their screwdriver for what seems like years now. And the crazy thing about how marketing works is that when you get repeatedly told about how great something is for long enough, you start thinking about how great it would be to have one of your own, even if you have no real use for it outside of a handful of times per year.

But the truth is I’ve wanted a ratcheting screwdriver for a while now.

Now, the question that you really need to answer about ratcheting screwdrivers is, what does it really give you that you can’t get from a good electric screwdriver, given that you’ll basically pay the same amount? And the answer is that, for the handful of times a year that you might actually use a screwdriver, you don’t have to worry about whether your screwdriver is charged, or worry about having to replace its batteries in however many years because the battery can no longer hold a charge and is borderline useless. Plus, by all accounts those handheld, pencil-shaped, battery-operated screwdrivers have such low torque anyway that they fall exactly into the chasm of suck between “might as well have used a manual screwdriver” and “might as well have used a proper cordless screwdriver”.

But a ratcheting screwdriver? When you’re working with computers, that can come in handy. Being able to use a screwdriver without having to remove and re-insert your bit into the screw, or take your hands off your screwdriver to reposition it, is actually super useful and comes in handy when screwing things in at awkward angles or when a little forwards pressure is needed.

But which one? Obviously, for any purveyor of LTT videos, the LTT screwdriver is the only choice. There’s only one problem: it’s $70 USD ($95 USD including shipping), which seems untenable in this economy. Even if it is undeniably good and purpose-built for working with computers, as you’d expect an LTT screwdriver to be.

So what did I buy instead? Two ratcheting screwdrivers, for less than what the price of what one LTT screwdriver would have set me back.

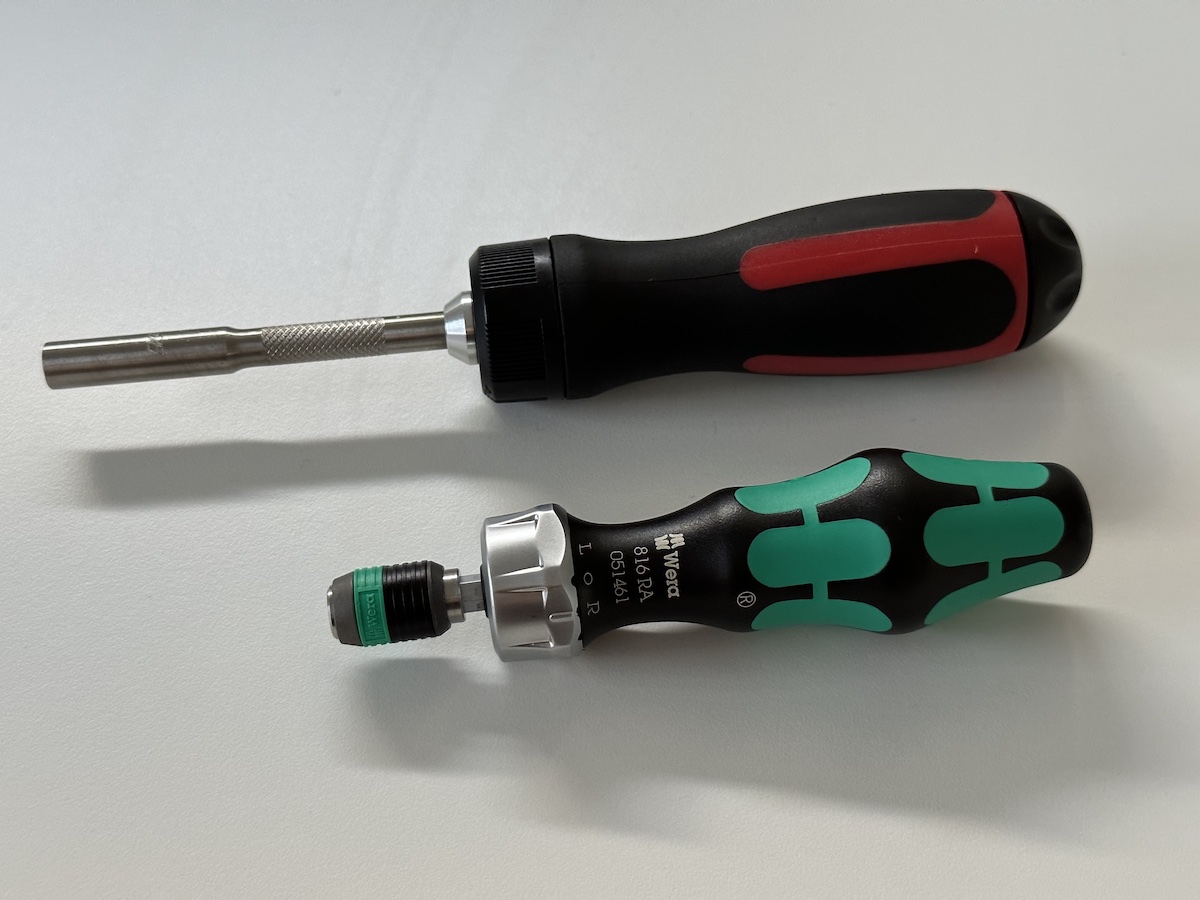
The TTI ratching screwdriver that I found at my local hardware store is pretty similar to the LTT one. Like the LTT screwdriver, there’s a knurled portion of the screwdriver shaft for when you need more precise rotation, and while it doesn’t have the fancy pop-up bit storage on the back-end, the end cap screws off to reveal a bit storage compartment. Although the 10 included bits are not mounted to the inside of the screwdriver, you can completely remove them and the clip they’re attached to if you prefer a lighter screwdriver. It’s even similarly balanced when the bits are stored in the rear compartment. But the TTI “only” comes with 10 bits instead of 12, and its included bits are less computer focused and more general use, so no hex or square bits. Instead, the TTI comes with Torx bits. The magnet seems strong enough, even if it’s not quite as strong as the LTT one. The TTI also has a satisfyingly loud, industrial-sounding ratcheting mechanism, and I picked it up because it seemed like the best option of the other ratcheting screwdrivers that they had available. Plus, it was comparatively a steal at $40 AUD — not the cheapest one there, but the it was better than the cheaper alternative.

The Wera 816 RA, on the other hand, was more of a luxury purchase at $66 AUD with no included bits. That’s not a huge deal, as I can either use an adapter to use some 4mm precision bits I already have from an older iFixit screwdriver kit, or use the bits that came with the TTI, or even choose to pick up another bit set entirely. But where the TTI is a fairly generic screwdriver, the Wera seems like some thought was put into its design. The handle is contoured, has grippy green rubber sections, and feels nice in the hand. The bit-holding mechanism is exactly the same as the one on the torque-limited ESD-safe screwdriver that I used for iPhone repairs, ensuring that there’s no way the bit is coming out when being used, and the ratcheting mechanism feels more precise and sounds more refined, more engineered, even if both screwdrivers have similar amounts of wobble and play in their mechanisms.

As for which one I prefer, I’m not sure. The Wera seems like it is better for more general PC usage, just because of how compact it is compared to the comparatively large TTI, while still being able to do some of the heavier duties like working on the exteriors of PC cases. But even the Wera is much larger and much heavier than the precision screwdrivers you can get from the likes of iFixit, which I prefer for using on tiny-scale electronics repairs like most consumer electronics, so maybe it really is just a case of using the best tool for the job.

Crazy, I know.

My New Year’s resolution: 5120×2880

Current setup, 2023 edition

My current setup, 2023 edition

Alternate title: you want to experience true level? Do you?1

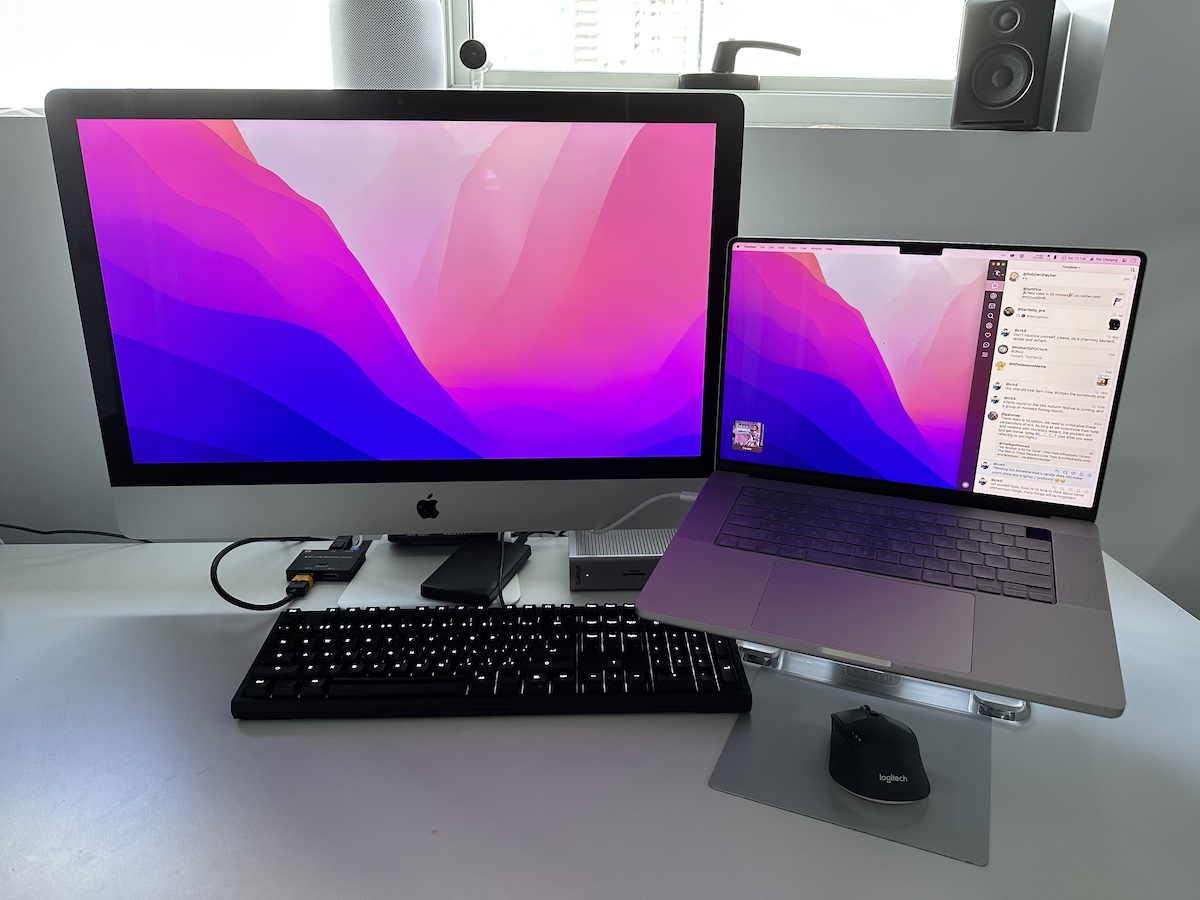
I have successfully converted a late-2015 27-inch Retina iMac into a standalone 5K display. After umm-ing and ahh-ing about it for a few weeks while I debated whether I wanted to potentially irreversibly disassemble a perfectly working iMac, I removed all the intervals of the iMac and replaced them with a 5K driver board that I bought from AliExpress, turning the whole thing into the cheapest standalone 5K display money can buy. Not to mention the only one that you can get that you can drive using regular old DisplayPort, no Thunderbolt required.

Why? All for an extra 55 PPI compared to readily available and much cheaper 27-inch 4K displays? Well, there are two main reasons you’d want to use a 27-inch 5K display compared to a 27-inch 4K one. But first, we need some Retina backstory…

Apple cops a lot of flack for introducing marketing terms without concrete technical specifications to back them up, and perhaps the best example of this is the term “Retina”. The Retina display article on Wikipedia actually has a pretty good explainer if you’re interested in the origin of the term, as well as what the derived definition is, based on what was said about it when it was first introduced with the iPhone 4, the first-ever Retina-class device. Remember, no concrete technical specs means we have to infer based on what we’ve been told at Apple launch events, but it seems to work.

The term Retina has been somewhat diluted now. A handful of prefixes and suffixes have been added to it to denote other variations on the theme, but whatever the marketing connotation, part of Apple’s theory behind Retina-class displays is that any display has to have a certain pixel density at a certain viewing distance, until you can no longer see individual pixels on the display. Obviously this assumes you have perfect eyesight, but putting that aside for the moment, for phones, that PPI figure is typically a lot higher than laptop or desktop displays because you’re typically holding your phone a lot closer to your face. That, in turn, means you need higher pixel density before you can’t discern individual pixels; hence higher PPI.2

You can do the maths yourself using any freely-available calculator, and Wikipedia has the actual formula. If you do, you’ll realise that theoretically, any display can be Retina if you’re sitting far enough away. For example, a 27-inch display using a very typical resolution of 2560×1440 is technically Retina from 80cm away. But I don’t know that many people who use their desktop displays from that far away, so not only do we have to start sitting closer, we have to go deeper into the Retina rabbit hole.

For simplicity’s sake, Apple also considers Retina to be a perfect multiplier of “standard” display resolutions. If we can’t change viewing distance in the Retina formula, we can simply put more pixels into the same space. By turning one pixel into four, quadrupling the total number of pixels and keeping everything else the same, that creates a sharper interface at the same physical dimensions. Earlier iPhones used a simple “2x” formula, with two times the number of pixels in both dimensions being four times the number of total pixels, but modern iPhones use a 3x scale which is nine pixels for every one on the original iPhone. For desktop displays, that means either doubling 1920×1080 referred to as 1080p or Full HD to give us 3840×2160 (4K), or doubling 2560×1440 (1440p) to 5120×2880 (5K). Apple refers to this as “HiDPI” mode.

What this means for us is that you can absolutely use a 27-inch 4K display in HiDPI mode, it will just look like a 1080p display, with four physical pixels representing every one. Which bring us to our first problem. If typical 1080p displays are usually in the 20-24 inch range, using a 27-inch display that looks like 1080p is too much physical screen for how much virtual screen real estate you get. Everything looks too big, which is where the magic of display scaling comes in.

But now we’ve introduced a second issue! Yes, you can use a scaled resolution on your 27-inch 4K display. Instead of the “native” pixel-doubling that you would get by using 3840×2160 physical pixels to represent 1920×1080, you can change the resolution of your external display up to 5120×2880 virtual pixels (which corresponds to a native pixel-doubling of 2560×1440), but then downscaling it to fit on the real 3840×2160 pixels that your display has. Doing so works, and fixes our issue of everything being too big, but this comes with its own set of issues, as per Bjango:

However, display scaling comes with some significant caveats, including a blurrier picture, shimmering when scrolling, moiré patterns, worse GPU performance, and worse battery life if you’re using a laptop. Display scaling also undoes dithering, which can mean gradients aren’t as smooth. With those issues in mind, it’s far, far better to run macOS at the pixel density it was designed for.

Check out their pictures and GIFs at the link, and you’ll be able to see the difference. Some of those issues aren’t as significant as others, but the biggest one for most people who care about this sort of thing is how using a scaled resolution makes your whole display look less crisp.

Continue Reading →

The new NAS

PC parts for a custom NAS build

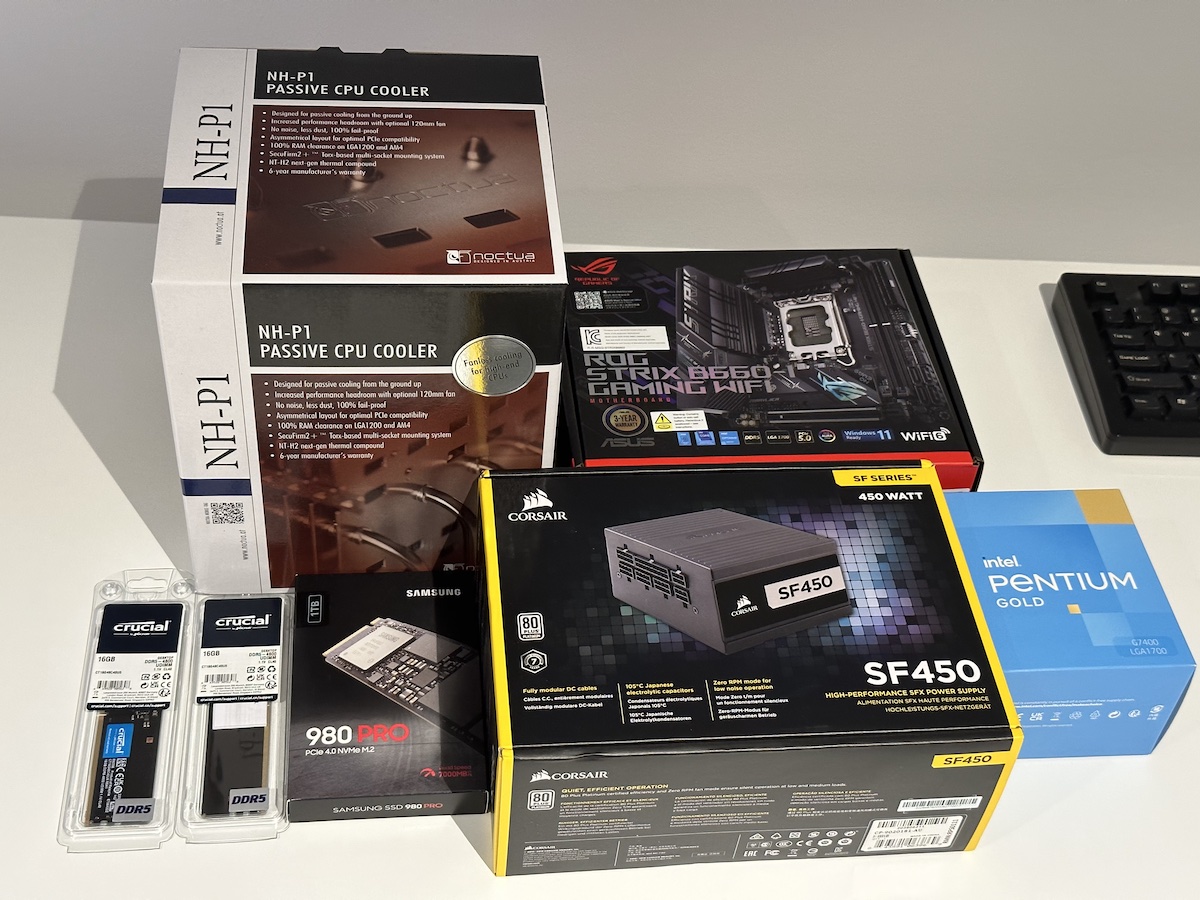
It’s close enough to 2023 now, and off the back of my QNAP being on borrowed time, it’s time to think about a new NAS. I’ve had a couple of NAS iterations over the years, starting off with a $200 HP MicroServer, then the aforementioned QNAP, and now, whatever I want to go with next.

I could, of course, go with another consumer-grade NAS like a Synology. Or even a QNAP if I am feeling particularly brave. Apparently, Synology units with processors that had the LPC CLK issue weren’t affected to the same degree as QNAP units were, because they implemented their LPC interfaces at 1.8V, preventing 2V over that circuit being an issue like it was in the QNAP units. That and/or in combination with a firmware update that somehow mitigated the issue, meant that a Synology unit would have been the more reliable choice at the time, and we wouldn’t even be having this discussion if I had purchased a Synology instead of a QNAP back in 2016.

Alas, I did, and we are.

Which brings us back to the original question: what kind of a NAS do I want in 2023, that will hopefully last 5-7 years, if not more?

I’ve been thinking about this for a while now. There are definite, distinct advantages to having an all-in-one unit like a QNAP or Synology. You get the smallest possible chassis, minuscule power usage, and the entire software experience that buying a QNAP or Synology gets you, which means that even if you’re going to run your own Docker containers and just use the software to manage your storage, it’s definitely a more cohesive, user-friendly experience compared to rolling your own OS. But even after all that, I’ve been drawn to the idea of building my PC to serve NAS duties for a while now.

Why? It comes down to hardware, both in terms of choice and flexibility.

Buying a consumer-grade NAS like a QNAP or Synology means you’re buying into their ecosystem, with all of the advantages and disadvantages that entails. Yes, you can upgrade the RAM and install your own drives but that’s about it in terms of upgrades. With the exception of some of their pricier units, you can’t drop-in a PCIe card to add discrete graphics, or more M.2 drives, or even 10 GbE, if that ever becomes a thing at home. Maybe it will, maybe it won’t.

There are some Synology units that let you buy a PCIe expansion card that lets you add 10 GbE as well as more M.2 slots (in addition to the ones you already have), by the time you pony up for one of the pricer Synology units and the PCIe expansion card, you’ve basically spent as much as you would have if you picked your own parts and built your own PC from scratch, with none of the benefits of having custom hardware. It’s a trade off. I think it makes way more sense to buy a QNAP or Synology NAS, compared to building your own, than it does for you to buy a pre-built gaming PC from a major computer retailer like Dell or HP, purely because you’ll get more value out of a consumer NAS that you do out of a gaming PC that uses non-standard parts and layouts. You’re far more likely to want to upgrade your gaming PC within its expected lifetime than you are your own NAS, and you’ll appreciate standard PC components at that point, way more than you would if you were to upgrade your NAS. But I digress, and that’s a topic for another time.

When you’re building your own NAS out of commodity PC hardware, you have the complete freedom to choose which standard PC components you want, and the flexibility that affords you down the line. You might not ever need to upgrade your QNAP or Synology CPU in the lifetime of your NAS — but don’t you wish you could, when something better comes along?

But if there was a single reason I wanted to build my own NAS, it comes from being able to have access to hardware transcoding. Specifically, Intel Quick Sync Video.

While video transcoding isn’t generally a problem for me right now, that’s not to say it won’t be in the future. The Celeron J1900 in my current QNAP supports Quick Sync, and I haven’t had an issue streaming most of my content to iOS devices via Plex due to the wonders of direct play and most of my content being in a format that’s compatible with my devices. But between various CPU architectures, Quick Sync support for different codecs and formats varies. My current CPU, while it supports H.264, will only support decoding HEVC H.265, not encoding it, with zero support for newer video codecs like VP9 or AV1, or even 10 or 12-bit HEVC H.265 which is sometimes used by HDR versions of those videos. I don’t currently have Quick Sync video working on my current QNAP, but that is probably a configuration issue on my part; it’s entirely possible I haven’t set it up correctly in the Plex container.

Not supporting hardware-accelerated video encoding/decoding means we’re back to software decoding. And if YouTubers are to be believed, AV1 is going to be the next big thing, so even if we have to wait for a couple of years for it to be adopted by content farms, won’t I be glad I’ll have picked a 12th gen CPU that can handle decoding AV1 in hardware, as opposed to some Ryzen chip that would have had to rely on sheer CPU grunt to do software encoding?

While this might not be a big deal right now, it’ll matter if everyone starts using the royalty free, and even more efficient AV1 format. If that happens within the remaining lifetime of my QNAP, that’ll be an issue for me because it will mean I’m back to software decoding everything. I’m using software transcoding now, and it’s an extremely poor experience on a quad-core 2.0GHz CPU, even on my local network. The good news is, only Intel Arc has access to AV1 hardware encoders, which means everyone else has to throw CPU grunt at the problem, if they want to encode their content in AV1.

The other main advantage of rolling your own NAS hardware is that you can run whatever OS you want on it. While there are technically ways you can run other OSes on QNAPs or Synology units, it’s a hack. Building my own NAS lets me choose between straight Linux, like whatever version of Ubuntu that I ran on my HP Microserver, or the more storage-focused flavours of Linux/BSD like Unraid or TrueNAS. TrueNAS in particular is interesting because it is known for natively implementing OpenZFS, which is generally regarded as the best storage-focused filesystem. I don’t currently have a need to run any of the crazier storage configurations afforded by ZFS as I’ll be limited by the hardware and case that I’ve chosen (at least to begin with), but it’s nice to know they’re an option, if I decide to do that later on down the track.

Continue Reading →

The QNAP of Death

Alternate title: the day my NAS died

A QNAP NAS with System Booting text

Not quite the same System Booting text I was greeted with, but close enough. Excuse the dust.

System booting? Yes but the system has been booting for literally hours now. If it hasn’t booted within five minutes, there’s something wrong.

And dear reader, there was indeed something wrong. I tried all the usual stuff; turning it off and on again, leaving it off for a couple of days, pulling all the hard drives out, turning it off and on in between all of those steps, but nothing worked, nor did it give me any kind of video output to indicate what might be wrong. It turned on, but wouldn’t boot into the OS. That probably should have been my first clue that although something was wrong, maybe it wasn’t completely dead. And if it wasn’t completely dead, then maybe there was something we could do to fix it.

But after unplugging every piece of hardware I had added to the QNAP and returning it to the stock hardware configuration, the thing would still not boot up properly, giving me that same error message. System booting. Whatever was wrong with it, it wasn’t because of something I had added or done to the system, which probably meant it was hardware-related. Ugh.

With my extensive troubleshooting prowess exhausted, it was time to turn to old mate Google.

Google immediately led me to a 100-page forum thread about the issue on QNAP own forums. This was either very good, or very bad. In my case it meant it was initially very bad because it meant I had to read through most of it, but then things turned out very good because within those 100 pages, there was the trifecta: a known recurring issue, exact steps to diagnose that specific issue, and a fix that worked for enough people for it to be considered the official unofficial fix.

The problem, as it was described, is some kind of “degraded” LPC clock. As I understand it, basically there’s some kind of timing component that keeps things in your PC running on time for lower-pin (Intel’s definition of lower-pin here actually means 1170 soldered pins) processors like the Intel Celeron J1900 in the QNAP that I have. What happens is that in some systems, including in my QNAP and even some Synology units, that the circuit for this LPC clock degrades over time due to “reasons”, and eventually reaches a state where it fails to provide a stable clock to the system, meaning that the CPU doesn’t work like it should. Or something along those lines, anyway.

According to the forum post it’s remarkably similar to an issue that affected the Intel C2000 Atom processors, which Cisco and Synology both issued advisories about all the way back in 2017, although that case was slightly more serious as it caused C2000 Atom-equipped gear to fail after as short as 18 months. In the case of my QNAP, it lasted over six years. Not bad, but buyer beware, I guess, not that you’d be able to tell this kind of thing at the time of purchase.

Thankfully, diagnosing the issue is pretty easy. Use a multimeter to measure the voltage between some pins or pads on the motherboard, depending on your specific model of QNAP, and if the voltage shows over 2V, your LPC CLK is likely broken and needs to be fixed if you want to use your NAS again.

The fix is easy enough as well. Because we need to drop the voltage of the LPC CLK signal, we can drop in a resistor. Experimentation by some helpful forum members indicated that a 100 Ohm resistor, soldered between the “negative cycle transistor” and ground, will restore the voltage to a correct value to allow the LPC CLK to supply a correct clock signal to the CPU.

Simple, right?

There was just one problem. Well, besides “the problem”. I don’t own a multimeter, nor a soldering iron. Oh, and I don’t really know how to solder. I’ve soldered before, but I wouldn’t say I’m particularly good at it. But as my old swimming coach used to say, no one is born knowing how to swim or solder, so I grabbed a cheap and cheerful soldering iron, some solder, a multimeter, and prepared myself for the hackiest soldering job in the world. Yes, it was really that bad. No, I didn’t trim the ends of the resistor. Yes, I probably should have. Yes, I managed to melt a little plastic connector next to where I was soldering, but in my defence, it was impractical to pull out the entire motherboard for easier access, so I kind of had to do it in situ while it was still attached to the case, which made it all the more awkward. No, I’m not going to show you a picture. Suffice to say, I got the job done. Just.

After all was said and done, and I put my drives back into the system, it booted up just fine. Not that I didn’t expect it to, given so many other people had had success after attempting the same fix, but it was still a relief. Getting the system back up and running again meant I didn’t have to try and go to lengths to recover the data I cared about, never mind wondering what was on there that I might have forgotten about in the first place.

I wish that was the end of the story. Alas, the forum had one more golden nugget of information to dispense, and that was that the fix was only temporary. Continued degradation of the clock timer was inevitable, and the next time it failed, there was no guarantee it would be fixable with any kind of resistor. It was hard to estimate how long the fix would work for, but six months to a couple of years seemed reasonable. Reasonable, but only if you were willing to put up with the fact that your NAS might die at any moment, and maybe even be completely unrecoverable from that point on.

Which worked for me, because now I knew that it was on the way out, it was time to build a replacement.

Retina Displays, Part Three

An iMac with its screen attached with electrical tape

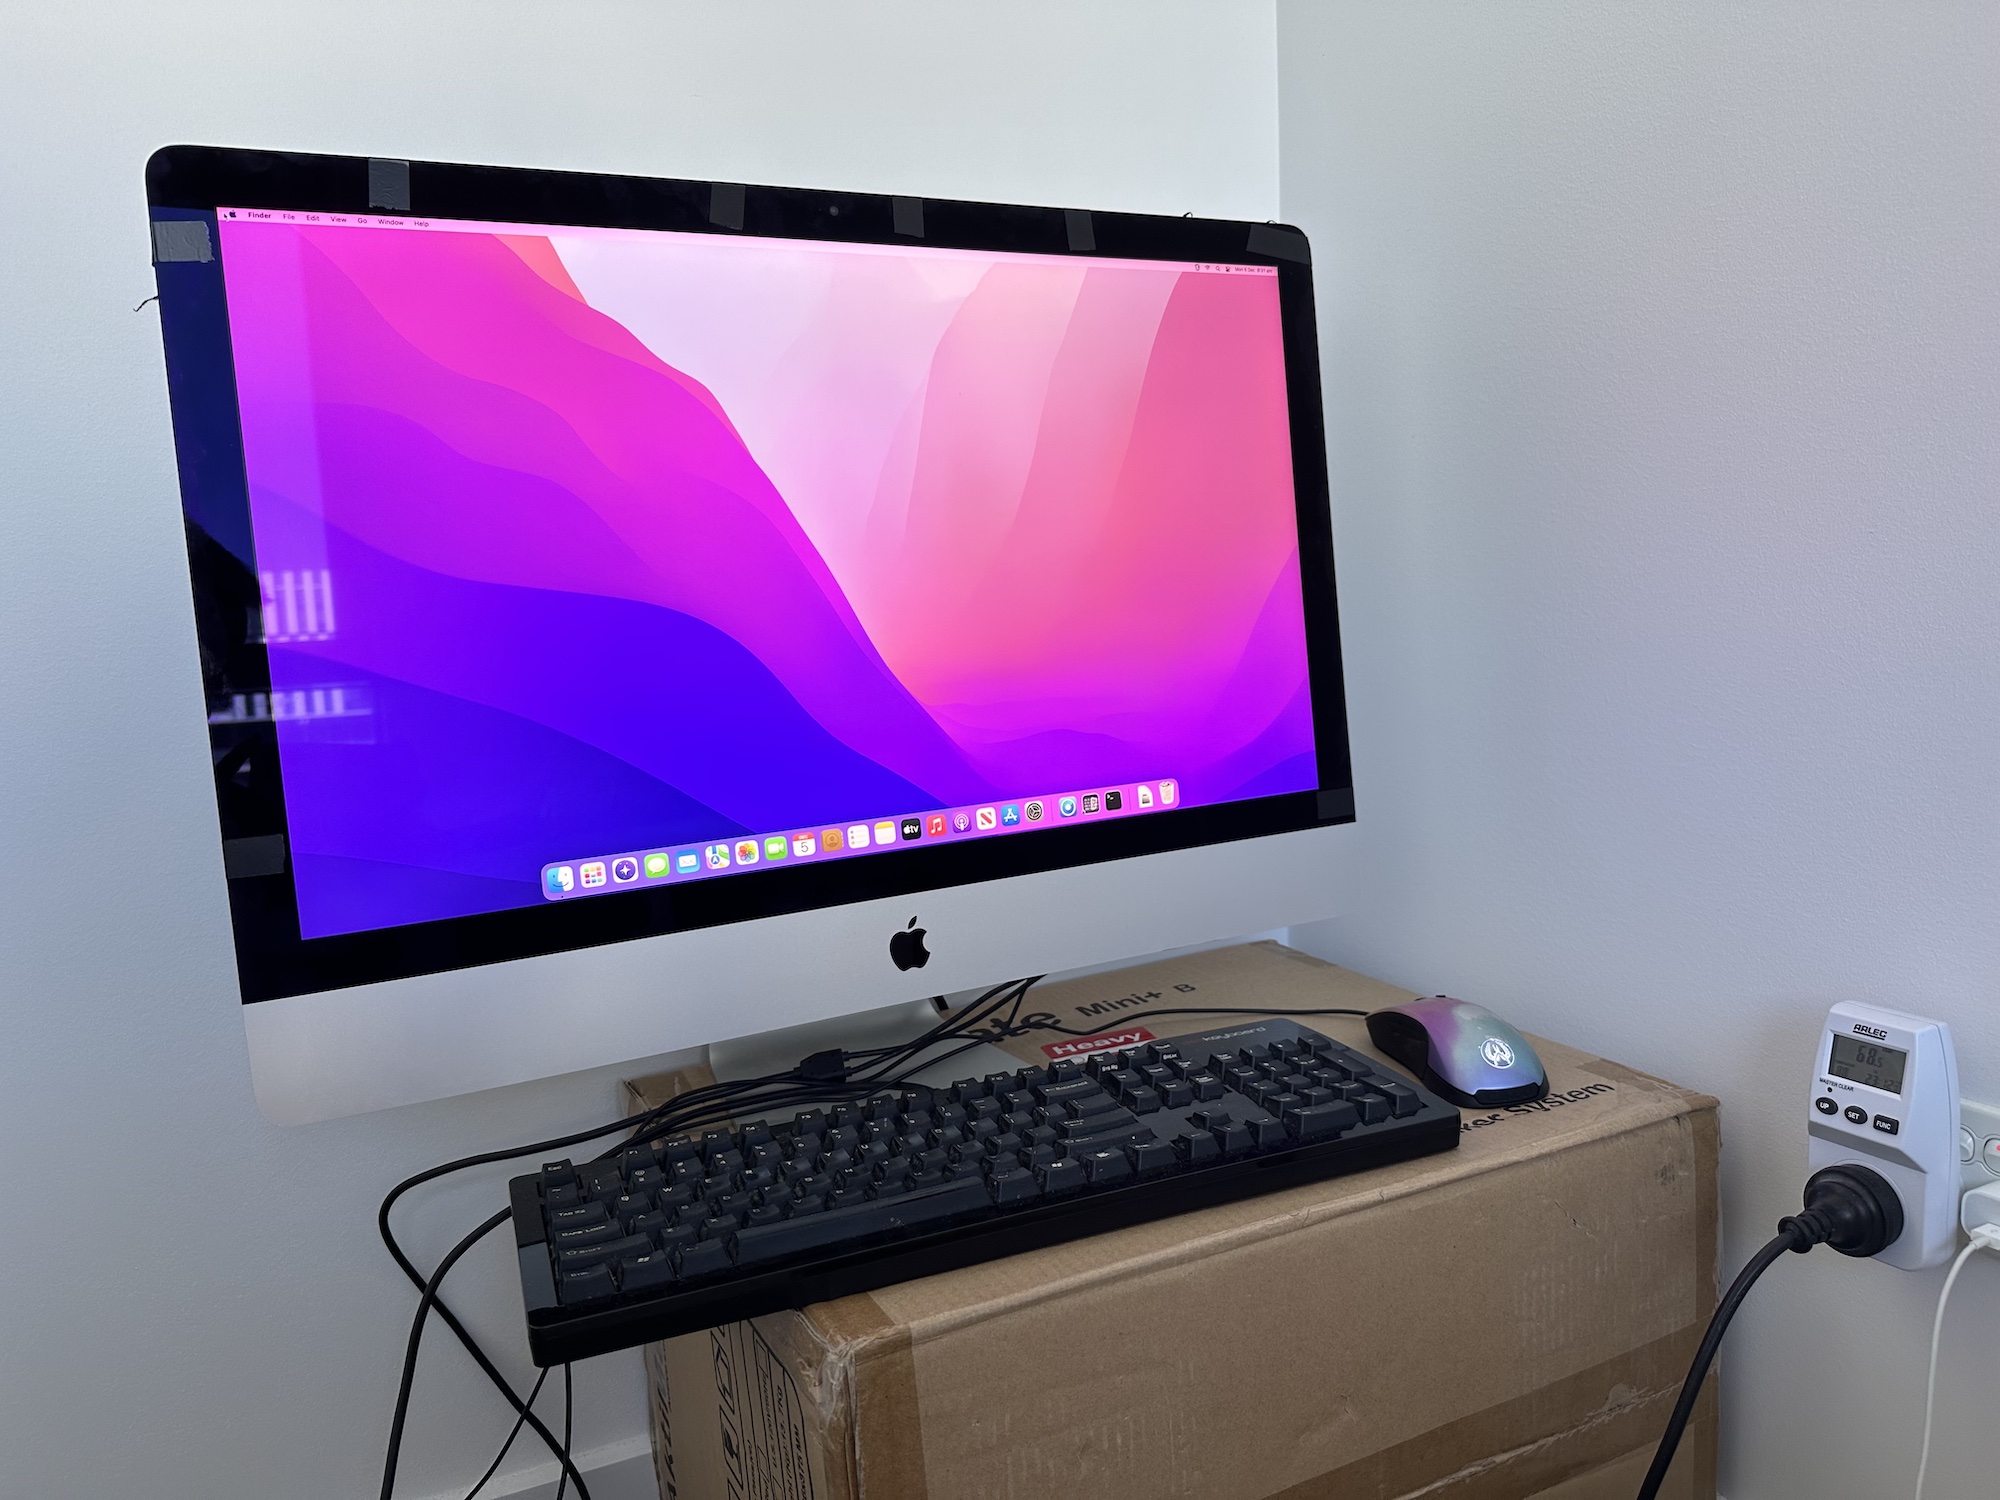
Yes, the screen is attached via electrical tape. Temporarily, because attaching it with adhesive is a one-time thing.

By some fortuitous mechanism that can only be described as “scoring something off the local computer forum” (close enough to be my own version of “scoring something for cheap off Craigslist”), I am now the proud owner of a late 2015 27-inch iMac. Yes, that’s right, the one with a 5K display. Now to be clear, there’s something wrong with this iMac, which is why I was able to get it for so cheap, but I figure if I can put a little work into it to get it working again, then that’s time well spent, in my books.

It’s a pretty decent-specced machine, too; an 4GHz quad-core Intel Core i7 (as it turns out, the same i7-6700K CPU that’s in my current gaming rig), maxed out with 32GB DDR3 RAM, and an AMD R9 M395 with 2GB VRAM. It’s in great condition, too. There are some very minor, superficial scratches on the display that you can only see if you’re looking for them when the screen is off, but otherwise no chips, dents, or scratches anywhere else on the screen or on the external aluminium enclosure.

The issue with this particular iMac was that its internal 3.5-inch hard drive was dead. These iMacs came standard with a Fusion Drive, which was Apple’s term for a SSD and HDD combo that was supposed to give you the best of both worlds in terms of speed and storage. This particular iMac had a 128GB SSD that still seemed to be working, but its hard drive was only good for making clicking sounds and being recognised as an unknown 4GB storage device, which I’m taking to mean it was one of those even weirder hard drives with built-in SSD caches, or something.

Installing the latest supported OS on the thing turned out to be a nightmare, even for someone who has had some experience with Macs. No matter what I did, macOS Monterey would get halfway installed before rebooting and restarting the install process. At first I thought this was some kind of reboot loop — an issue I also experienced with my own late 2013 MacBook Pro when attempting to install Catalina or Big Sur, I can’t remember which — but no matter how many times I tried, I couldn’t get Monterey to finish installing. Catalina, on the other hand, installed fine. I had issues getting Big Sur install media working, so for the time being, it was Catalina or nothing.

I suspected my Monterey install issues were related to the failed internal hard drive. That seemed to line up with the random kernel panics I was getting in Catalina, where it seemed like macOS would attempt to access the internal hard drive, realise it was dead, and then freak out and fall over when it didn’t know what to do. It seemed Catalina was as far as this thing was going. At least not without opening it up, disconnecting the hard drive, and then trying again… which is what I ended up doing about two weeks later, after some tools arrived for me to open it properly (and put it back together again).

See, my original plan for this machine was to turn it into a standalone 5K display. I had first heard of the idea via The Sizzle, a great tech newsletter by the founder of MacTalk. By pulling out all the internals of the iMac and replacing them with a relatively inexpensive — I’d hesitate to call it cheap, but it was definitely cheaper than buying a standalone 5K display — driver board you can buy from AliExpress, you can turn your 5K iMac into a standalone display that you can drive via regular old DisplayPort, which is great if you’re after none of the complexities that come with a Thunderbolt-driven 5K display1. A YouTuber probably wasn’t the first person to turn a 5K iMac into a standalone display, but they probably contributed to popularising the idea.

Like I mentioned in my other post on Retina-class displays, there are very few options if you want something other than the not-quite-Retina-class 4K at 27-inches, and none of them can be had for under $1800. With any luck, this iMac conversion will be a third of that. Not cheap — you could easily buy a great display for $600, even if it’s not quite 4K 144Hz, but 1440p 144+ Hz is easily doable — but much less expensive than what a new 5K display would set you back.

Continue Reading →